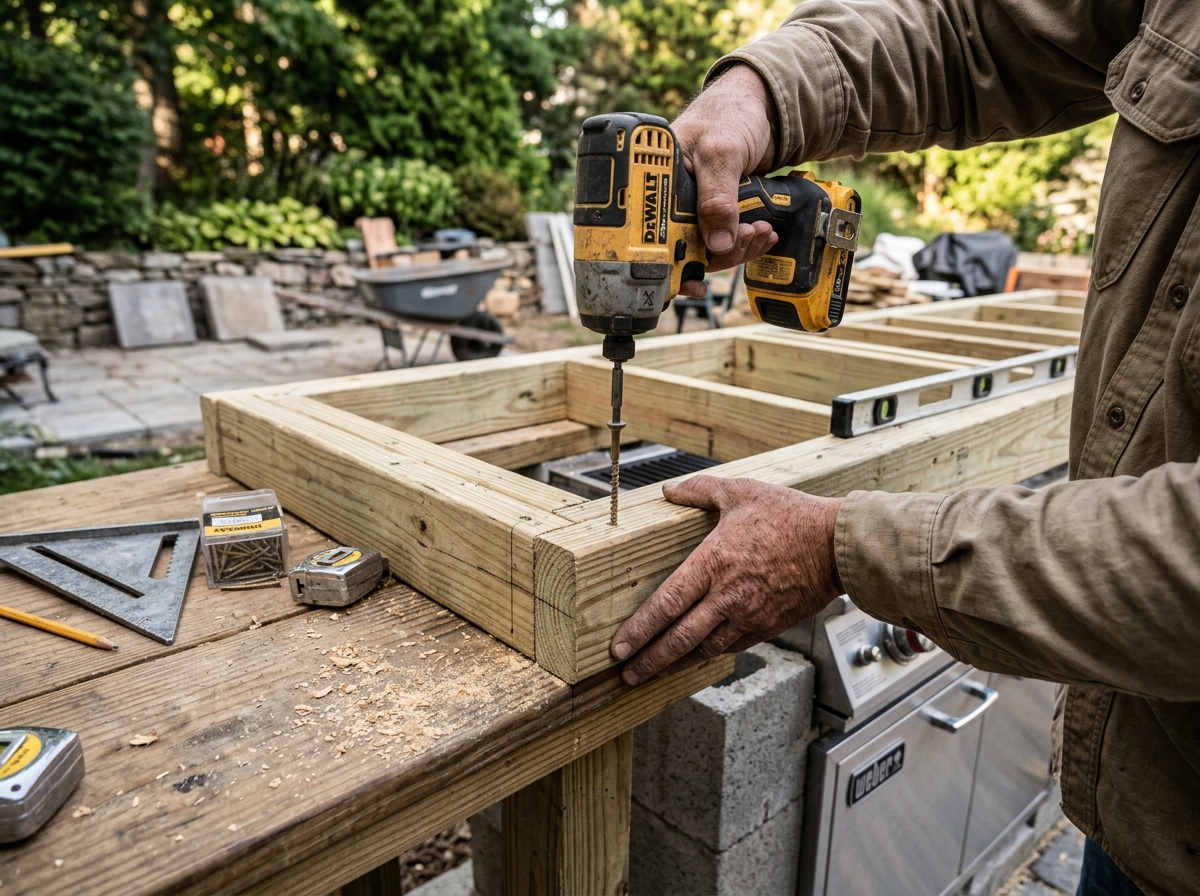
Most people assume an outdoor kitchen is a rich person’s weekend project — something that requires a contractor, a big budget, and maybe an architect. That assumption costs them years of bad backyard cookouts.
The truth is, a solid, functional outdoor kitchen can be built by someone with basic DIY skills, a clear plan, and a realistic budget starting around $3,000–$5,000 for a simple setup. No fancy tools required. No contractor on speed dial.
What does stop most people isn’t the building — it’s the planning. They jump straight to choosing a grill and then realize they have no idea where to put the gas line, what surface to build on, or whether their patio can even support the weight of stone and steel.
This guide walks you through the whole thing — from picking a spot to firing up the burners — in a way that actually makes sense.
Start With Location, Not Appliances
Most outdoor kitchen projects fail before a single brick is laid — because people start shopping for grills before they’ve answered the most basic question: where exactly is this going?
Your location affects everything. Drainage, access to utilities, shade, wind direction, and how far your guests will have to walk with a plate in hand. Spend real time on this before anything else.
The 4 Things Your Spot Must Have
Proximity to your indoor kitchen. You don’t want to be running 40 feet for a spatula. The closer your outdoor kitchen is to your back door, the more you’ll actually use it. Think 10–20 feet as an ideal range.
A solid, level surface. Your kitchen will be heavy — we’re talking 1,500 to 3,000+ pounds when you factor in masonry, countertops, and appliances. A floating deck isn’t going to cut it unless it’s been engineered for that load. A concrete slab is the most reliable base, and for most builds, that’s exactly what you should start with.
Utility access. Think about where your gas line, electrical outlets, and water source will come from. The further your kitchen is from these, the more it costs to run them. Gas line extension alone can add $300–$800 to your project, depending on distance and your local rates.
Wind and smoke direction. Stand in your chosen spot on a few different days and feel where the wind comes from. You don’t want smoke blowing into your house — or into your guests’ faces every time you open the lid.
Pro Tip: Use chalk or garden hose to mark the footprint of your planned kitchen on the ground. Live with it for a day or two. Walk around it, imagine cooking there. You’ll immediately know if something feels off.
Plan the Layout Before You Buy Anything
Once your location is locked in, you need a layout. This is where most DIYers get excited and start buying things before they’ve thought it through — and then end up with a grill that doesn’t fit, or no room for counter space on the wrong side.
Outdoor kitchens generally follow a few common layouts:
Straight/Linear: Everything in one line. Best for smaller spaces or when you’re building along a fence or wall. Simple to build, easy to work with.
L-Shaped: Gives you more counter space and naturally creates a social corner. Works well when you have a patio corner available.
U-Shaped: The most functional for serious cooking — but you need the space. Usually 12+ feet on at least two sides.
For a first build, a straight layout between 8 and 12 feet long is usually the sweet spot. You get enough room for a grill, a side burner, some prep space, and maybe a small refrigerator or storage cabinet — without it becoming an overwhelming construction project.
Rough Sizing to Keep in Mind
Your grill typically needs 30–36 inches of dedicated space. Leave at least 18–24 inches of prep counter on each side of it. If you’re adding a sink, plan for 24 inches minimum, plus you’ll need to think about drainage. Storage cabinets or doors usually run in 18–24 inch increments.
Sketch this out on paper. It doesn’t need to be an architectural drawing — just boxes with dimensions so you can see how everything fits before you start cutting anything.
Build the Frame: Steel Stud or CMU Block?
This is the structural backbone of your outdoor kitchen, and your choice here affects both cost and longevity.
Steel Stud Framing
Steel studs (the same light-gauge metal used in commercial construction) are popular for DIY outdoor kitchens because they’re lightweight, relatively cheap, and easy to work with using a basic metal snip and screw gun. You build the frame like a wall skeleton, then cover it with cement board and tile or stone veneer.
The advantage is speed and cost — a steel stud frame for a 10-foot kitchen might cost you $150–$250 in materials. The limitation is that it’s not quite as rigid or “solid” feeling as masonry, and in very wet climates, poor construction can lead to moisture problems if not properly waterproofed.
If you go this route: use exterior-grade cement board (like HardieBacker or DensShield), apply a waterproof membrane over it before tiling, and make sure your base isn’t sitting directly on soil.
CMU Block (Concrete Masonry Unit)
Concrete blocks — the standard 8x8x16 gray blocks from any home improvement store — are what most permanent outdoor kitchens are made from. They’re heavy, sturdy, weather-resistant, and about $2–$3 per block. A full kitchen might use 60–100 blocks.
Building with CMU means stacking and mortaring, which is slower and requires a bit more skill — but the result is genuinely solid. You can tile directly over CMU with the right adhesive (use polymer-modified thinset rated for exterior use). Most professional-looking DIY outdoor kitchens you see on YouTube are CMU builds.
Quick Fact: CMU block construction has been used in outdoor kitchens across Florida, Texas, and the Southwest U.S. for decades because it handles humidity and heat far better than wood framing.
If you’re building in a wet or humid climate, CMU is almost always the better long-term choice. If you’re in a drier region and want a faster build, steel studs with proper waterproofing work fine.
Choosing the Right Countertop Material
Your countertop takes more abuse than any other surface out there — heat, grease, rain, direct sun, and the occasional heavy pot landing on it. Not every material survives this equally.
Granite remains one of the most popular choices and for good reason. It handles heat well, looks great, and is genuinely durable outdoors. You’ll need to seal it annually in most climates. Expect $60–$100 per square foot installed, or less if you source remnants from a local fabricator — which is a seriously underused trick. Many fabricators have offcuts from kitchen jobs that are perfect for outdoor counters.
Concrete is a DIYer’s favorite because you can pour it yourself. Mix it, form it, finish it, seal it — and you have a completely custom countertop for a fraction of the cost. The catch is that concrete does crack over time with freeze-thaw cycles, so if you’re in a climate that gets below freezing, seal it well and expect some maintenance.
Porcelain tile is the most budget-friendly path. Large-format porcelain (24×24 or bigger) looks clean, handles heat, and is easy to clean. The grout lines need sealing and occasional regrouting, but the tile itself is nearly indestructible.
What to avoid: Wood (warps and rots), laminate (peels and swells), and standard indoor granite sealers (they’re not UV or moisture rated).
The Grill and Appliances: Buy Smart, Not Aspirational
Here’s where people overspend fast. Walk into any outdoor kitchen showroom and you’ll find gorgeous built-in grills for $2,000–$8,000. Some of those are worth it. Most aren’t — especially for a first build.
What You Actually Need vs. What’s Nice to Have
A built-in gas grill between 30–36 inches is the core of most outdoor kitchens. Brands like Blaze, Bull, and Napoleon offer solid performance in the $500–$900 range for DIY builds — they’re drop-in units designed specifically for built-in installation and don’t require you to spend three grand on a name.
A side burner is genuinely useful if you actually cook outdoors regularly — not just grill. It lets you do sauces, boil water, heat sides without running inside. If you’re honest with yourself and you only fire up the grill six times a summer, skip it.
An outdoor refrigerator — specifically one rated for outdoor use — is worth it if you entertain often. The key word is “outdoor rated.” A standard indoor mini-fridge will struggle to maintain temperature in summer heat and can fail within a season. Outdoor-rated units handle ambient heat up to 110°F. Expect to spend $300–$600 for a decent 24-inch unit.
A sink with running water is a legitimate upgrade if you’re cooking seriously out there. You’ll need a cold water line (and ideally hot), plus a drain — either to a dry well/gravel pit or tied into your home’s drainage. If plumbing feels like too much for your first build, skip the sink for now and use a simple outdoor water spigot nearby.
Warning: Never use a propane grill designed for freestanding use as a drop-in built-in appliance without checking the ventilation specs. Built-in cavities need specific clearances for heat to escape. Using the wrong grill in an enclosed counter can cause heat buildup, damage, and in worst cases, a fire hazard.
Utilities: Gas, Electric, and Water
This section is where a lot of DIYers get nervous — and rightfully so. Running utilities to your outdoor kitchen isn’t something to wing.
Gas Lines
Most outdoor kitchens run on natural gas (connected to your home’s gas supply) or propane from a dedicated tank. Natural gas is more convenient — you never run out mid-cook. Propane gives you flexibility if your home doesn’t have gas.
Either way, the actual gas line work should be done by a licensed plumber or gas fitter. In most U.S. states, it’s legally required and it matters for insurance reasons. Budget $300–$700 for a gas line extension, and call your local utility company to mark your lines before any digging.
Electrical
If you want outlets for blenders, lighting, or an outdoor TV, you’ll need a GFCI-protected outdoor circuit. This typically means running conduit from your breaker panel. Again, an electrician for this part is strongly recommended — outdoor electrical has specific code requirements for weatherproof boxes, conduit burial depth, and circuit protection.
Basic outdoor lighting can often be run off a low-voltage landscape lighting system, which is a totally manageable DIY job.
Permits — Don’t Skip This Part
Many homeowners skip permits to save time and money. That works fine until you try to sell your house and an inspector finds an unpermitted gas line and structural addition. In most U.S. municipalities, an outdoor kitchen with a gas hookup, electrical, and a concrete slab requires at least a building permit. Some areas require a separate gas and electrical permit too.
Call your local building department before you start. It takes 20 minutes and saves you from real problems later.
Finishing Touches That Make It Feel Complete
The structural and functional elements get you cooking. These details make you actually love the space.
Lighting. String lights, recessed patio lights, or under-counter LED strips transform the space for evening use. Most people who build an outdoor kitchen use it far more at night than they expected — especially in summer when it’s cooler after sundown.
Shade. A pergola, sail shade, or even a large market umbrella makes your kitchen usable on hot afternoons and keeps rain off your appliances. This often gets treated as an afterthought, but shade directly affects how much you use the space.
Storage. Stainless steel access doors and drawers — the kind made for outdoor kitchens — keep your tools, charcoal, and supplies organized and weatherproof. They come in standard sizes (usually 18″, 24″, 30″) to match your frame layout. Don’t use indoor cabinet hardware outside; it rusts fast.
Flooring. If your kitchen is on a concrete slab, consider textured pavers or anti-slip tile for the surrounding floor area. Grease and rain create slippery surfaces — especially bare concrete.
What This Is Actually Going to Cost
Let’s be honest about numbers, because most guides dance around this.
A basic outdoor kitchen — straight layout, 8–10 feet, built-in gas grill, tile countertop, CMU or steel stud frame — runs $3,000–$6,000 in materials if you’re doing the labor yourself. That includes the slab, frame, grill, tile, and basic electrical/gas work.
A mid-range build with a granite countertop, outdoor fridge, side burner, stainless storage doors, and proper lighting lands around $7,000–$12,000 in materials.
Hiring a contractor to do the full build typically runs $15,000–$30,000+ for what you could build yourself for a third of that. That’s the real value of DIY here — not just the savings, but the fact that you know exactly what’s inside your kitchen and you can fix it yourself when something needs attention.
Did You Know? According to the National Association of Realtors, an outdoor kitchen can return 100–200% of its cost in home resale value — particularly in warm-weather states like California, Texas, Florida, and Arizona.
FAQ
Q: Do I need a permit to build a DIY outdoor kitchen?
In most U.S. cities and counties, yes — especially if your kitchen involves a permanent structure (like a concrete slab and masonry frame), a gas line connection, or electrical wiring. Requirements vary significantly by location. Check with your local building and zoning department before starting. Skipping permits can create problems when selling your home or making an insurance claim.
Q: What’s the best material for outdoor kitchen countertops in a rainy or humid climate?
Porcelain tile and properly sealed granite are your most weather-resistant choices in high-humidity or rainy climates. Concrete works but requires consistent sealing and can crack with freeze-thaw cycles. Avoid any wood or laminate surfaces — they simply don’t hold up outdoors long-term.
Q: Can I convert a freestanding gas grill into a built-in for my outdoor kitchen?
Technically possible, but generally not recommended unless you verify the manufacturer’s ventilation requirements. Most freestanding grills are designed with open airflow around them. Enclosing one without proper ventilation clearances can cause heat buildup, damage the grill, and create a safety hazard. Built-in grills (drop-in models) are specifically designed with the clearances and insulation for enclosed counters.
Q: How long does a DIY outdoor kitchen project take?
For someone working weekends with basic DIY experience, a straight-layout kitchen with a concrete slab, CMU frame, tile countertop, and built-in grill typically takes 4–8 weekends from slab pour to first cookout. The slab alone needs 7 days to cure before you build on it. Planning and permits add time upfront, but that front-loaded effort makes the actual build go smoothly.
Q: What’s the biggest mistake first-time DIY outdoor kitchen builders make?
Skipping the layout plan and buying appliances first. People fall in love with a grill or a refrigerator, buy it, and then try to design a kitchen around it — which almost always creates fit and proportion problems. Design the layout first, decide on your counter depths and heights, then buy appliances that fit the plan.
Ready to Start? Here’s Your Actual Next Step
You don’t need to figure all of this out in one weekend. The best outdoor kitchens get built by people who planned well — not fast.
Start with a sketch. Mark your space. Call your building department. Then, and only then, start pricing materials. That sequence alone will save you money, time, and the specific frustration of being halfway through a build and realizing something doesn’t fit.
Your backyard has been waiting long enough for a kitchen worth cooking in. Start with the plan, and the build takes care of itself.