A meat thermometer tells you the internal temperature of the food at the sensor point on the probe. That’s the number you use to judge safety and doneness.
It does not tell you how hot the outside looks. It doesn’t care if the crust is dark, the juices run clear, or the meat “feels done.” It reads one thing only: the temperature at the tip, or sensing zone, inside the meat.
That’s why thermometers beat guesswork every time.
Think of the probe like a flashlight in a dark room. It only shows the tiny spot you point it at. If you place it in the wrong area, you get the wrong answer.
Quick fact: Color alone can fool you. Ground beef can turn brown before it reaches a safe temperature. Chicken can stay slightly pink near the bone even after it’s fully cooked. The USDA has warned about both for years, which is why internal temperature is the standard.
A lot of people really want the same answer here: “What number means my meat is actually done?” That’s fair. But before the number helps you, the placement has to be right. A perfect thermometer in the wrong spot is still a bad reading.
There’s another thing that trips people up. Safe doesn’t always mean tender, and tender doesn’t always mean safe. A pork shoulder can be safe long before it’s soft enough to shred. A steak can hit a texture you love before it reaches the USDA’s lower-risk target. So you need to read the thermometer with a little context, not as a random number on a screen.
Once you understand that, the rest gets much easier.
Know your thermometer before you use it
Not every meat thermometer works the same way. Some read fast. Some need deeper insertion. Some stay in the oven the whole time. If you know which type you’re holding, you’ll know how to read it correctly.
Digital instant-read thermometers
For most home cooks, a digital instant-read thermometer is the easiest tool to trust.
You insert the probe into the meat, wait a few seconds, and read the number on the display. Then you pull it out. That’s it.
Many digital models place the sensor near the tip. That’s good news for thinner foods like burgers, pork chops, fish fillets, or chicken breasts. You can often insert the probe from the side and get an accurate center reading.
Some fast digital models use a thermocouple sensor. Others use a thermistor. You don’t need to memorize the science. Just know this: a good digital thermometer usually reads faster and more accurately than the old-school dial style.
If you cook often, this is usually the most practical option.
Dial thermometers
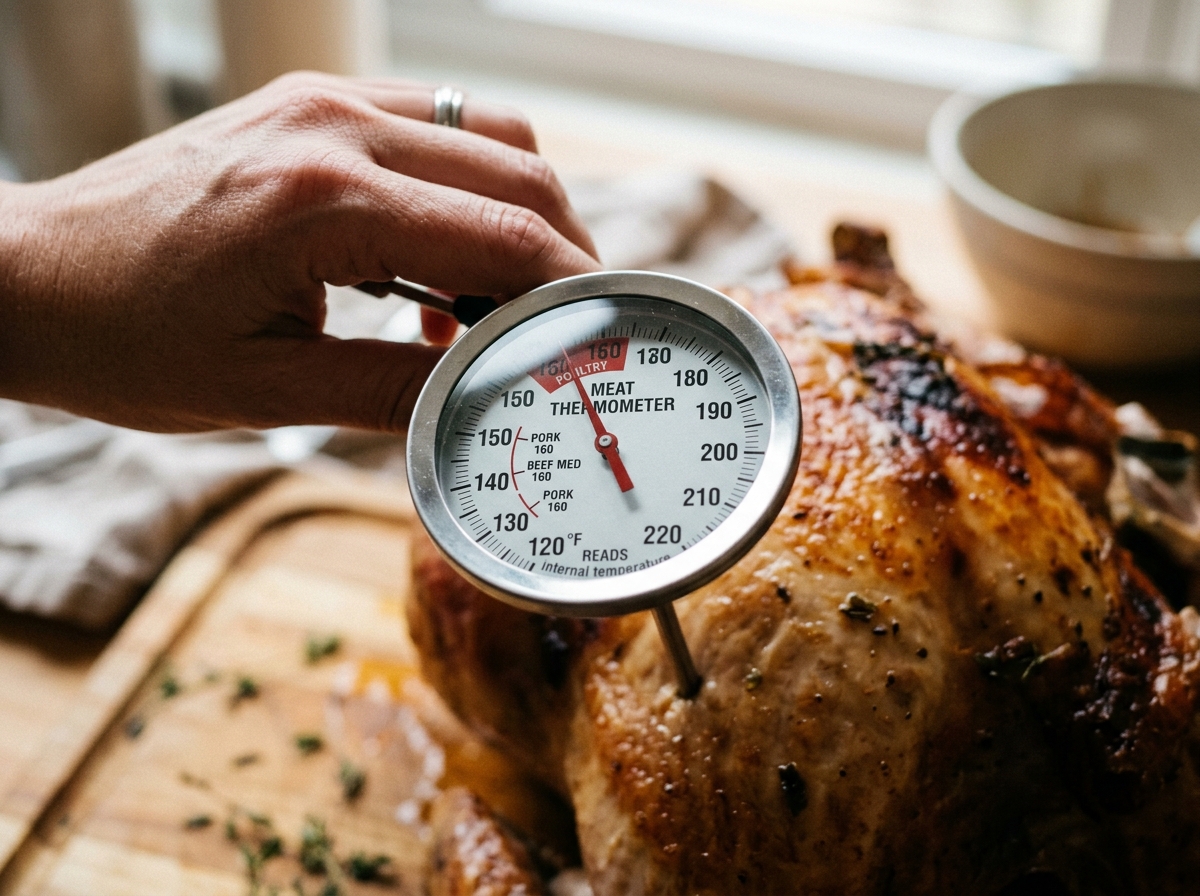
A dial thermometer has an analog face with a needle. You’ve probably seen these in older kitchen drawers or clipped onto a roast pan.
They still work, but they usually need more time and more depth.
On many dial thermometers, the sensing area is not just the tip. It can run an inch or two up the stem. That means they’re harder to use on thin cuts. If you push one straight down into a burger or chicken breast, the whole sensing area may not sit in the center of the meat. The reading can be off.
That’s one reason people get confused and say, “My thermometer makes no sense.”
Oven-safe probe thermometers
A probe thermometer stays in the meat while it cooks. A wire connects the probe to a display outside the oven, smoker, or grill. Some newer models connect to an app.
These are great for large cuts like turkey, brisket, pork shoulder, prime rib, or a big roast. You set a target temperature, and the unit alerts you when the meat gets there.
That said, a probe thermometer still needs correct placement. If the probe sits too close to bone or too near the surface, the number can mislead you for hours.
Pop-up timers
Those little plastic pop-up timers in some turkeys? Treat them as a rough reminder, not a final answer.
They can pop late, early, or not in the coolest spot. If you want a turkey that’s safe and not dried out, use a real thermometer.
Warning: Don’t leave an instant-read thermometer inside the oven, grill, or smoker unless the manufacturer clearly says it’s oven-safe. Instant-read models are usually for quick checks only.
How to read a meat thermometer step by step
Here’s the simplest version of how to read a meat thermometer:
Reading a digital instant-read thermometer
- Insert the probe into the thickest part of the meat.
- Keep the tip away from bone, fat, gristle, or the cooking pan.
- Wait until the number stops changing or settles.
- Check another spot if the cut is large, uneven, or bone-in.
- Compare the lowest reading to your target temperature.
That’s the short version. Now let’s make it practical.
Start with the thickest area because that’s usually the last part to finish cooking. If you check a thinner edge, it may read done while the center is still undercooked.
Next, pay attention to what the probe touches. Bone heats differently than meat. Fat can read hotter in some spots. If the tip hits the hot pan, grill grate, or roasting tray, the number can jump and fool you.
Then wait. A digital instant-read may settle in 2 to 5 seconds on a fast model, or closer to 10 seconds on a slower one. Don’t yank it out the second you see a number. Watch for the reading to level off.
After that, check another place. Large cuts almost never cook perfectly evenly. A whole chicken may be cooler near the thigh joint. A roast may be hotter near one side if your oven has a hot spot. If one area reads 165°F and another reads 158°F, trust the lower number.
That last point matters. Many people see the highest number and feel relieved. The safer habit is to look for the coolest spot in the thickest part.
Reading a dial thermometer
A dial thermometer needs a bit more patience.
Insert it deep enough so the sensing area sits fully inside the meat. On many models, that means about 2 inches. Wait 15 to 20 seconds, sometimes longer, for the needle to settle.
This is where thin foods become tricky. A dial thermometer is not the best tool for a thin burger or a small chicken breast. If that’s what you cook most, a digital instant-read is usually a better fit.
Reading an oven-safe probe thermometer
For a probe thermometer, place the probe before cooking starts or early in the cook.
Push the tip into the center of the thickest part. Route the cable so it doesn’t get pinched in the oven door or sit over direct flame. Set your target temperature on the display.
Then keep an eye on the number as the meat cooks.
If you’re roasting a turkey, smoking a brisket, or cooking pork shoulder, a probe thermometer saves you from opening the oven or smoker every few minutes. That helps with heat control too.
Still, don’t trust a probe blindly if the result seems odd. If a turkey “hits temp” way too early, or a roast seems stalled forever, check with a second thermometer in another spot.
Pro tip: Start checking meat a little before the recipe says it should be done. Time is only a rough guide. Thickness, starting temperature, oven accuracy, grill heat, and even the weather can change the finish time.
Where to place a meat thermometer in different meats
This is where most mistakes happen. People often know the target temperature but miss the placement.
Chicken and turkey
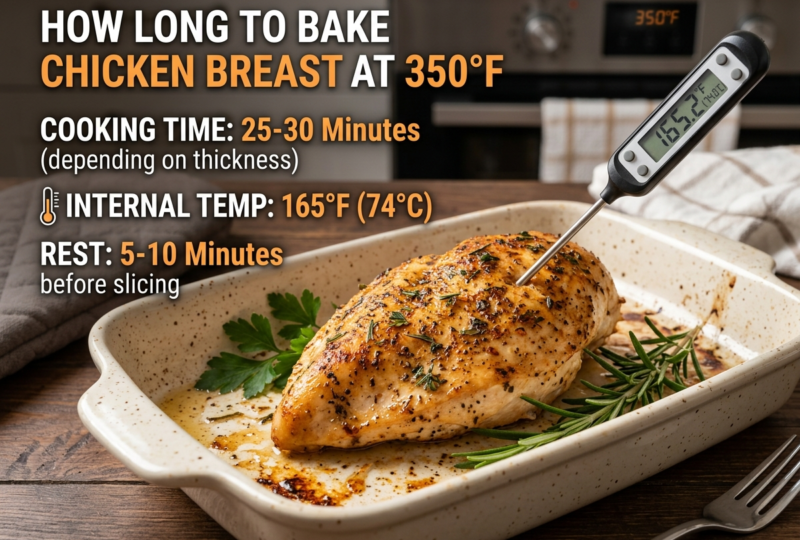
For chicken breasts, place the thermometer in the thickest part of the breast. If the breast is thin, insert the probe from the side instead of stabbing straight down from the top. That helps the sensor land in the center.
For chicken thighs or drumsticks, aim for the thickest part of the meat and avoid touching bone. Bone can throw off the reading.
With a whole chicken, check both the breast and the inner thigh area near the body. With a whole turkey, check the thickest part of the breast and the innermost part of the thigh, again without touching bone.
Why two places? Because turkey often cooks unevenly. The breast may finish before the thigh, or the opposite can happen in some ovens.
A small but useful detail: chicken thighs are safe at 165°F, but many people like them better around 175°F to 185°F because the texture softens more. So if your thigh reads 168°F, it’s safe. If it reads 180°F, that doesn’t mean you ruined it.
Beef, burgers, and roasts
For a steak, the center matters most. If the steak is thick, you can insert the thermometer from the top or from the side. If it’s thin, go in from the side so the sensor lands in the middle.
For burgers, insert the probe through the side into the center. That gives a better reading than pushing straight down through the top, especially on thinner patties.
For a roast, place the thermometer in the center of the thickest section. Try to avoid fat pockets and bone. If it’s a bone-in roast, don’t let the probe rest against the bone.
Brisket is its own world. The thick flat and the point can cook at different speeds. If you’re smoking brisket, check more than one area, especially near the thickest part of the flat.
Pork, lamb, and fish
Pork chops are usually better checked from the side, especially if they’re not very thick. For pork loin or pork roast, go into the center of the thickest part.
Lamb chops work like pork chops and steaks. Side entry often works best. A leg of lamb should be checked in the deepest center section, away from bone.
Fish can be harder because many fillets are thin. If the fillet is thick enough, insert the probe into the center from the side. If it’s very thin, temperature can be less practical, and visual signs help too. Still, for thick salmon fillets, cod loins, or tuna steaks, a thermometer can be very useful.
A good rule across all meats: if the cut is thin, enter from the side. If it’s thick, aim for the center. If there’s bone, stay clear of it.
What temperature means your meat is done
Now for the number everyone wants.
Safe minimum internal temperatures
The USDA’s food safety guidance is the standard many home cooks in the U.S. follow. Here’s the quick version:
| Meat or food | Safe minimum temp | Notes |
|---|---|---|
| Poultry: chicken, turkey, duck | 165°F / 74°C | Check the thickest part; for whole birds, check breast and thigh |
| Ground meats: beef, pork, lamb, veal | 160°F / 71°C | Includes burgers, meatloaf, sausage patties |
| Whole cuts: beef, pork, lamb, veal | 145°F / 63°C | Rest for 3 minutes after cooking |
| Fish and shellfish | 145°F / 63°C | Flesh should also turn opaque and flake easily |
| Leftovers, stuffing, casseroles | 165°F / 74°C | Useful for holiday cooking and reheating |
If you remember nothing else, remember this: poultry 165°F, ground meat 160°F, whole cuts 145°F plus rest.
That gets you very far.
Safe and tender aren’t always the same thing
This part confuses a lot of people.
A cut can be safe before it tastes its best.
Take brisket or pork shoulder. These cuts are technically safe well before 195°F. But if you pull them at 165°F, they’ll likely be chewy and tight. Why? Because collagen hasn’t broken down enough yet. That soft, pull-apart texture usually comes later, often around 195°F to 205°F.
The same idea shows up in chicken thighs. They’re safe at 165°F, but many cooks prefer them a bit higher for better texture.
So if you’re cooking a tender cut like chicken breast, pork chop, or steak, the safe temperature is often close to the eating target. If you’re cooking a tough cut like brisket, chuck roast, or pork shoulder, safety happens earlier and tenderness comes later.
What about steak doneness?
People ask this all the time because steak is usually about preference.
A rough doneness range looks like this:
- Rare: around 120°F to 125°F
- Medium-rare: around 130°F to 135°F
- Medium: around 140°F to 145°F
- Medium-well: around 150°F to 155°F
- Well-done: 160°F and up
Those are doneness targets, not the USDA’s lowest-risk standard for whole cuts. If you want to follow the safer home-cooking benchmark, cook whole cuts to 145°F and rest for 3 minutes.
If you’re cooking for pregnant people, older adults, young kids, or anyone with a weaker immune system, it’s smart to stick closely to USDA targets instead of restaurant-style lower steak temps.
Did you know? Meat often keeps cooking after you take it off the heat. That’s called carryover cooking. Large roasts can rise several degrees while resting, which is why timing and rest matter so much.
Common mistakes and smart tips
A meat thermometer is simple, but a few small mistakes can throw the reading off.
Why does the number keep changing?
Because meat doesn’t cook evenly, and the thermometer reads a tiny area.
Move the probe half an inch and you may get a different number. That’s normal. The outside layers are hotter. The center is cooler. Bone-in cuts are uneven by nature. So if the display jumps around as you test different spots, don’t panic.
Use the lowest reading in the thickest area as your real guide.
Another reason numbers change is timing. If you read too fast, the sensor hasn’t settled yet. If you leave the oven door open too long, surface heat can escape and slow the cook. If the probe touches a hot pan or grill grate, the reading can spike.
How to get a more accurate reading every time
Start checking early, not late. Once meat overshoots the target, you can’t undo it. A chicken breast pulled at 172°F won’t go back to 165°F, and the extra heat often means less juice.
Clean the probe between checks if it touches raw and then cooked areas. That helps prevent cross-contamination. Hot soapy water works for most probes, as long as the manufacturer says the probe is washable. Don’t soak the whole display unit unless it’s made for that.
Rest your meat after cooking. Whole cuts like pork loin, steak, and roast beef benefit from a few minutes of rest. Juices settle, temperature evens out, and carryover cooking can finish the job.
If your readings seem weird every time, test the thermometer.
An easy home check is an ice-water test. Fill a glass with ice, add a little water, stir for about 30 seconds, then insert the probe without touching the glass. It should read close to 32°F or 0°C.
You can also test in boiling water, which is about 212°F or 100°C at sea level. If you live at a higher altitude, that number will be lower, so ice water is often the easier check.
One more common misconception deserves a quick cleanup: clear juices don’t prove doneness. Neither does “it feels firm.” Those clues can help, but they’re not enough on their own.
A thermometer doesn’t guess. That’s why it wins.
4. FAQ Section
FAQ
How long should I leave a meat thermometer in?
Leave it in only until the reading settles, unless it’s an oven-safe probe model made to stay in during cooking. A fast digital instant-read might need just a few seconds. A dial thermometer may need 15 to 20 seconds or more.
Can I leave a meat thermometer in the oven?
Only if the thermometer is labeled oven-safe or is a dedicated probe thermometer. Most instant-read thermometers are not meant to stay in the oven, grill, or smoker. If you leave the wrong type in, heat can damage the tool and give bad readings.
Do I need to calibrate my meat thermometer?
You don’t need to calibrate it before every meal, but it’s smart to check accuracy now and then, especially if you drop it or notice strange readings. An ice-water test is the simplest home check. It should read close to 32°F or 0°C.
Why is my chicken still pink at 165°F?
Chicken can stay pink near the bone, in darker meat, or after certain cooking methods like smoking. Pink color alone doesn’t mean it’s undercooked. If the thickest part reads 165°F, it has reached the USDA safe temperature.
Should I check the meat before or after resting?
Check it before resting to know when to pull it from the heat, then remember that some meats keep rising a few degrees while they rest. For whole cuts like beef, pork, lamb, and veal, the USDA also calls for a 3-minute rest at 145°F.
Why do I get different readings in different spots?
That usually means the meat is cooking unevenly, which is normal. Bone, fat, thickness, and oven hot spots all affect the temperature. Check a few places and trust the lowest reading in the thickest part.
5. Conclusion
Once you know how to read a meat thermometer, cooking meat stops feeling like a guessing game. You’re not relying on color, timing, or luck anymore. You’re using the one clue that actually tells you what’s happening inside the food.
Next time you cook chicken, burgers, pork chops, or a roast, keep the thermometer close and check the thickest part before serving. After a meal or two, it’ll feel as normal as preheating the oven—and your food will be better for it.