A single undercooked drumstick can ruin dinner and send everyone reaching for cereal instead. And overcooked? You’re looking at dry, stringy meat that even the best sauce can’t save. The good news is that baking chicken drumsticks at 400°F hits the sweet spot between crispy skin and juicy meat — once you nail the timing.
The quick answer: Bake chicken drumsticks at 400°F for 35 to 45 minutes. But here’s what most recipes won’t tell you — that timing changes based on drumstick size, whether you’re starting from frozen, your oven’s personality, and a few other factors that make the difference between “pretty good” and “restaurant quality.”
Let’s break this down so you never second-guess your chicken again.
Why 400°F Works Best for Chicken Drumsticks
You’ve probably seen recipes calling for temperatures anywhere from 350°F to 450°F. So why does 400°F keep showing up as the recommended temperature for drumsticks?
It comes down to what’s happening inside and outside the chicken at the same time. Drumsticks have more connective tissue than chicken breasts. That tissue needs time to break down and become tender. Too high a temperature (like 450°F), and the outside burns before the inside cooks through. Too low (like 350°F), and you’re waiting forever while the skin stays pale and flabby.
At 400°F, the skin renders its fat and crisps up while the meat underneath cooks evenly. The collagen in the drumstick breaks down into gelatin, which is what gives properly cooked dark meat that silky, pull-apart texture.
Pro Tip: Your oven’s actual temperature might differ from what the dial says by 25°F or more. If your chicken consistently comes out wrong, an oven thermometer (around $7 at any kitchen store) can solve mysteries you didn’t know existed.
Exact Baking Times Based on Drumstick Size
Not all drumsticks are created equal. A drumstick from a small fryer chicken weighs around 4 ounces, while those big ones from the warehouse store can hit 8 ounces each. That size difference means different cooking times.
Small drumsticks (3-4 oz each): 35-40 minutes
These cook faster because heat reaches the bone more quickly. Check them at the 35-minute mark.
Medium drumsticks (5-6 oz each): 40-45 minutes
This is the most common size you’ll find at regular grocery stores. The 40-45 minute range works reliably for these.
Large drumsticks (7-8 oz each): 45-50 minutes
Those jumbo drumsticks need extra time. Don’t rush them — undercooked chicken near the bone is a real possibility if you pull them too early.
Quick Fact: The USDA requires chicken to reach an internal temperature of 165°F for safety. For drumsticks specifically, many cooks (and the USDA itself for dark meat) note that 175-180°F actually tastes better because the extra time breaks down more connective tissue.
The Right Internal Temperature (And Why 165°F Isn’t the Whole Story)
You’ve heard 165°F repeated so often it’s practically a mantra. And yes — 165°F is the safe minimum temperature where harmful bacteria are destroyed. Your drumsticks are safe to eat at this point.
But safe and delicious aren’t always the same thing.
Dark meat chicken (thighs and drumsticks) contains more collagen and fat than white meat. That collagen needs higher temperatures to fully convert into gelatin. Pull your drumsticks at exactly 165°F, and you might notice the meat is safe but slightly chewy, especially right near the bone.
For the best texture, aim for 175-180°F in drumsticks. The meat becomes more tender, pulls away from the bone more easily, and has that satisfying fall-apart quality you’re probably imagining right now.
Where should you insert the thermometer? Push it into the thickest part of the drumstick, avoiding the bone. The bone conducts heat differently than meat and can give you a false reading.
Did You Know? That pink color near the drumstick bone doesn’t always mean undercooked chicken. Young chickens have porous bones that allow hemoglobin to seep into surrounding meat during cooking. If your thermometer reads 175°F+, that pink tint is harmless.
Step-by-Step: Baking Chicken Drumsticks at 400°F
Getting consistently great drumsticks isn’t complicated, but each step matters. Skip the pat-dry step, and you’ll wonder why your skin isn’t crispy. Crowd the pan, and everything steams instead of roasts.
What you’ll need:
- Chicken drumsticks (however many you’re making)
- Sheet pan or baking dish
- Wire rack (optional but recommended)
- Oil or melted butter
- Salt and your preferred seasonings
- Meat thermometer
Step 1: Bring drumsticks to room temperature
Take your drumsticks out of the fridge 20-30 minutes before cooking. Cold chicken straight from the refrigerator cooks unevenly — the outside overcooks while waiting for the cold center to come up to temperature. This step alone improves your results noticeably.
Step 2: Preheat your oven to 400°F
Start this before you prep the chicken. You want a fully preheated oven, not one that’s still climbing to temperature when the chicken goes in. Most ovens take 15-20 minutes to truly stabilize at the set temperature.
Step 3: Pat the drumsticks completely dry
This might be the most skipped step in chicken cooking, and it’s why so many people complain about soggy skin. Moisture is the enemy of crispiness. Use paper towels and really press — you want the surface as dry as possible.
Step 4: Season generously
Oil or melted butter first (about 1 tablespoon per pound of chicken), then salt and seasonings. The oil helps seasonings stick and promotes browning. Don’t be shy with salt — a lot of it stays on the surface and some falls off onto the pan.
Step 5: Arrange on the pan properly
Here’s where a wire rack makes a real difference. Place drumsticks on a wire rack set inside your sheet pan. Air circulates underneath, so the skin crisps all the way around. No rack? Arrange drumsticks directly on the pan with space between them — at least an inch. Touching drumsticks trap steam where they meet, leaving you with one crispy side and one soggy side.
Step 6: Bake for 35-45 minutes
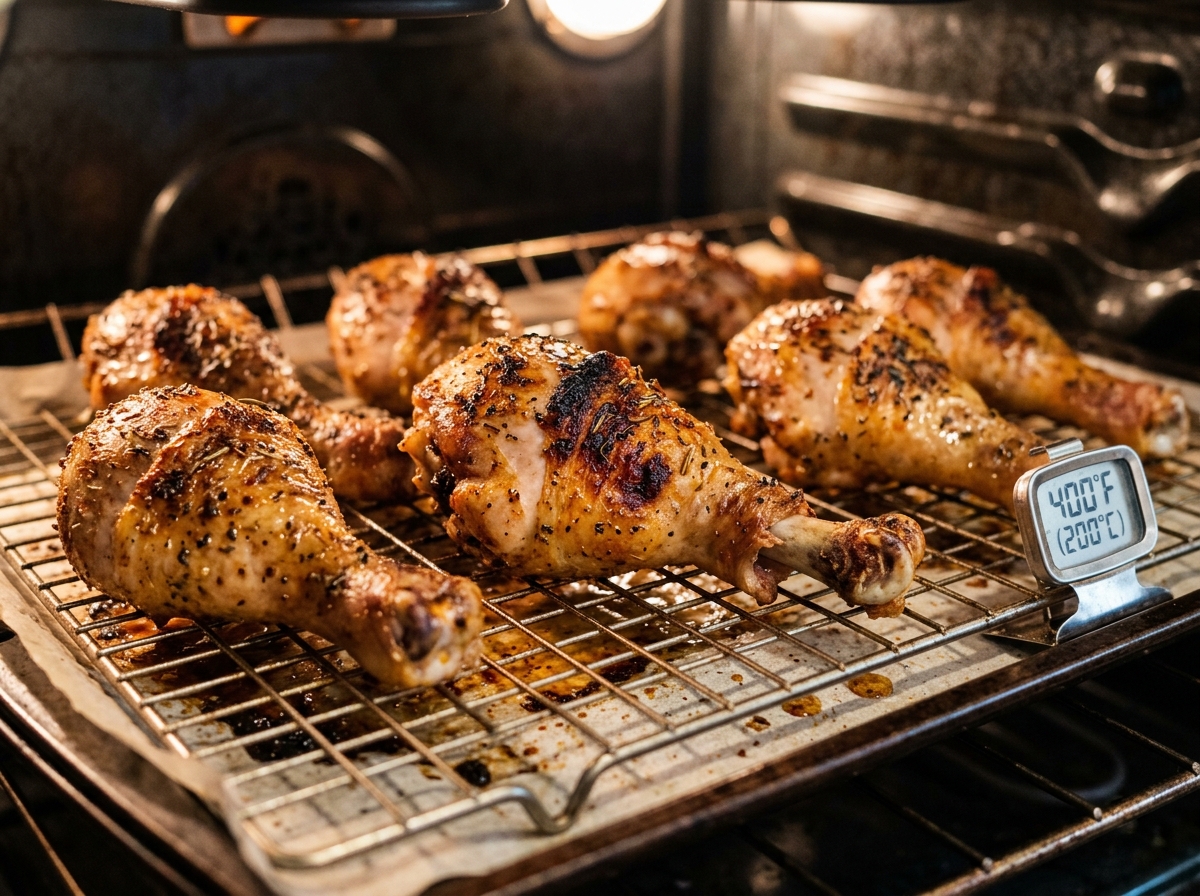
Place the pan in the center of your oven. Set a timer for 35 minutes, then check. You’re looking for golden-brown skin and an internal temperature of at least 165°F (ideally 175-180°F).
Step 7: Rest before serving
Give your drumsticks 5 minutes on the counter before serving. This lets juices redistribute through the meat. Cut into one immediately and those juices run out onto your cutting board instead of staying in the meat where they belong.
Getting That Crispy Skin: What Actually Works
Crispy chicken skin might be the whole reason you’re baking drumsticks instead of just boiling them. But achieving it consistently requires understanding what makes skin crisp in the first place — and avoiding the mistakes that keep it soggy.
Dry the skin thoroughly. We covered this, but it bears repeating. Surface moisture creates steam, and steam makes things soft, not crispy.
Don’t marinate too long in wet marinades. A quick 30-minute soak in buttermilk or citrus-based marinade is fine. Overnight? The skin absorbs moisture and won’t crisp no matter what you do. For longer marinating, use dry rubs or oil-based marinades instead.
Skip the foil cover. Covering drumsticks traps steam. Your meat stays moist, sure, but your skin turns into wet leather. Bake uncovered the entire time.
Consider a finishing broil. If your drumsticks hit 175°F but the skin isn’t as brown as you’d like, turn on the broiler for 2-3 minutes at the end. Watch constantly — broilers work fast, and the line between “beautifully browned” and “burned” is about 45 seconds.
Baking powder trick: Mix 1 teaspoon of baking powder (not baking soda!) with your seasonings per pound of chicken. It raises the skin’s pH, which helps it brown faster and crisp better. You won’t taste it in the final product.
Baking Frozen Drumsticks at 400°F
Life happens. You forgot to thaw the chicken. Can you bake frozen drumsticks directly, and if so, how long does it take?
Yes, you can bake frozen drumsticks at 400°F. Plan for about 50-60 minutes total.
The USDA confirms that cooking frozen chicken is safe — it just takes approximately 50% longer than fresh or thawed chicken. A drumstick that normally takes 40 minutes will need closer to an hour from frozen.
A few adjustments for frozen drumsticks:
The seasoning won’t stick as well to frozen surfaces. About halfway through cooking (around the 25-30 minute mark), pull the pan out and season the now-thawed exterior. Brush with oil, add your spices, then return to the oven.
Expect less crispy skin. Starting frozen means more moisture to deal with throughout the cooking process. The skin will brown, but it won’t reach the same crispiness level as fresh drumsticks. That finishing broil helps here.
Space becomes even more important. Frozen drumsticks release more liquid as they cook. Crowding guarantees steaming. Use a larger pan or cook in batches.
Warning: Never bake frozen drumsticks that have been sitting at room temperature for more than two hours. Once thawing starts outside the refrigerator, bacteria multiply quickly on the outer surfaces while the inside stays frozen. If you’re going to thaw, do it in the fridge overnight or under cold running water.
Common Drumstick Problems (And How to Fix Them)
Even following instructions carefully, things occasionally go sideways. Here’s what might have happened and how to adjust.
Problem: Skin is crispy but meat is undercooked
Your oven probably runs hot, or the drumsticks were colder than you thought when they went in. Next time, drop the temperature to 375°F or take drumsticks out of the fridge earlier. For now, cover loosely with foil and continue baking until internal temperature hits 175°F.
Problem: Meat is cooked but skin is pale and rubbery
Either the skin was too wet starting out, or you crowded the pan. Too many drumsticks trap steam and prevent browning. Try the broiler for 2-3 minutes to crisp things up. Next time, dry the skin better and give each piece breathing room.
Problem: Drumsticks cooked unevenly — some done, some not
Different sizes in the same batch cause this. Remove smaller ones as they finish and let larger ones continue. Or try to buy drumsticks similar in size. Also check that your oven heats evenly — hot spots are common and rotating the pan halfway through helps.
Problem: Skin stuck to the pan
You need more fat between the chicken and the pan. A light coating of oil on the pan (or cooking spray) prevents sticking. A wire rack eliminates this problem entirely since the skin never touches the pan surface.
Problem: Meat is dry throughout
You probably cooked them too long. Internal temperature above 190°F starts drying out even dark meat. A meat thermometer prevents this guessing game. If it’s already happened, slice the meat and toss with butter or serve with extra sauce.
Flavor Variations That Work Well at 400°F
Once you’ve got the basic timing down, experimenting with flavors is where things get fun. Here are some combinations that work particularly well with the high-heat roasting method.
Classic herb and garlic: Mix 2 tablespoons softened butter with 3 minced garlic cloves, fresh thyme, rosemary, and a squeeze of lemon. Rub under and over the skin. The butter bastes the meat as it melts while the garlic caramelizes.
Honey mustard glaze: Whisk together equal parts honey and Dijon mustard with a splash of soy sauce. Brush onto drumsticks during the last 15 minutes of cooking — earlier and the sugars burn.
Smoky barbecue: Use your favorite dry BBQ rub for the first 30 minutes. Brush with BBQ sauce during the final 10 minutes. The sauce caramelizes without burning at this point.
Spicy buffalo: Bake plain (just salt and pepper), then toss cooked drumsticks in melted butter mixed with hot sauce immediately after they come out of the oven.
Lemon pepper: Simple and classic. Zest of one lemon, plenty of cracked black pepper, garlic powder, and salt. The lemon zest blooms in the high heat.
Pro Tip: Sugar-based sauces and glazes should only go on during the last 10-15 minutes. Sugar burns at temperatures well below 400°F, so early application means bitter, blackened spots instead of appetizing caramelization.
How Many Drumsticks Per Person?
Planning quantities for a meal is trickier with drumsticks than with boneless chicken because so much of the weight is bone.
For adults: Plan on 2-3 drumsticks per person as a main course. More if drumsticks are on the smaller side, fewer if they’re jumbo.
For kids: 1-2 drumsticks typically works, depending on age and appetite.
For parties or appetizers: Figure on 1.5 drumsticks per person if other food is being served.
A pound of drumsticks usually contains 4-5 pieces. For a family of four with average appetites, 2 pounds (8-10 drumsticks) is a safe bet.
Storing and Reheating Leftover Drumsticks
Made too many? Leftover drumsticks actually reheat pretty well if you do it right.
Storage: Place cooled drumsticks in an airtight container. Refrigerate within 2 hours of cooking. They’ll stay good for 3-4 days.
Reheating in the oven (best method): Place drumsticks on a wire rack over a sheet pan. Bake at 375°F for 15-20 minutes until heated through. This keeps skin relatively crispy.
Reheating in the microwave (fastest): It works, but the skin turns soft. If you’re shredding the meat for tacos or salads anyway, this doesn’t matter.
Freezing: Cooked drumsticks freeze well for up to 4 months. Thaw overnight in the fridge before reheating.
FAQ Section
Can I bake chicken drumsticks at 400°F without oil?
You can, but the skin won’t crisp as well and seasonings won’t stick properly. A light coating of oil promotes better browning and helps your spices adhere. If you’re watching fat intake, use just a teaspoon — it still helps more than none at all.
Should I flip chicken drumsticks while baking?
If you’re using a wire rack, flipping isn’t necessary since air reaches all sides. If drumsticks are sitting directly on a pan, flip them once halfway through (around 20 minutes) to brown both sides evenly. Use tongs to avoid piercing the skin and letting juices escape.
Why are my drumsticks still pink inside even at 165°F?
Pink near the bone is common and safe in properly cooked drumsticks. The porous bones of young chickens allow pigment to leach into surrounding meat. If your thermometer reads 165°F or higher, the chicken is safe regardless of color. This is different from pink in the center of the meat away from bone, which might indicate undercooking.
How do I know when drumsticks are done without a thermometer?
While a thermometer gives certainty, you can check by cutting into the thickest part near (but not at) the bone. Juices should run clear, not pink. The meat should pull away from the bone easily when twisted. The skin should be golden brown. That said, a meat thermometer costs under $15 and removes all guesswork.
Can I bake drumsticks at 400°F with vegetables on the same pan?
Yes, but choose vegetables that can handle the temperature and timing. Root vegetables (potatoes, carrots, onions) work well because they need similar cook times. Cut them into pieces roughly the same size for even cooking. Softer vegetables (broccoli, zucchini) should go in during the last 15-20 minutes or they’ll overcook.
The Takeaway
Baking chicken drumsticks at 400°F for 35-45 minutes (depending on size) gives you that ideal combination — crispy, golden skin with juicy meat that slides off the bone. The keys are simple: dry skin before seasoning, don’t crowd the pan, use a thermometer to hit 175-180°F, and let them rest for five minutes before serving.
Your oven might run a little hot or cool, your drumsticks might be bigger or smaller than average, and your preferences for skin crispiness might differ from someone else’s. Pay attention the first few times, adjust based on what you see, and you’ll quickly develop an instinct for exactly what works in your kitchen.
Now go make some drumsticks. They’re one of the most forgiving, delicious, and budget-friendly proteins you can cook — and with these guidelines, dinner tonight is going to be good.